
Introduction
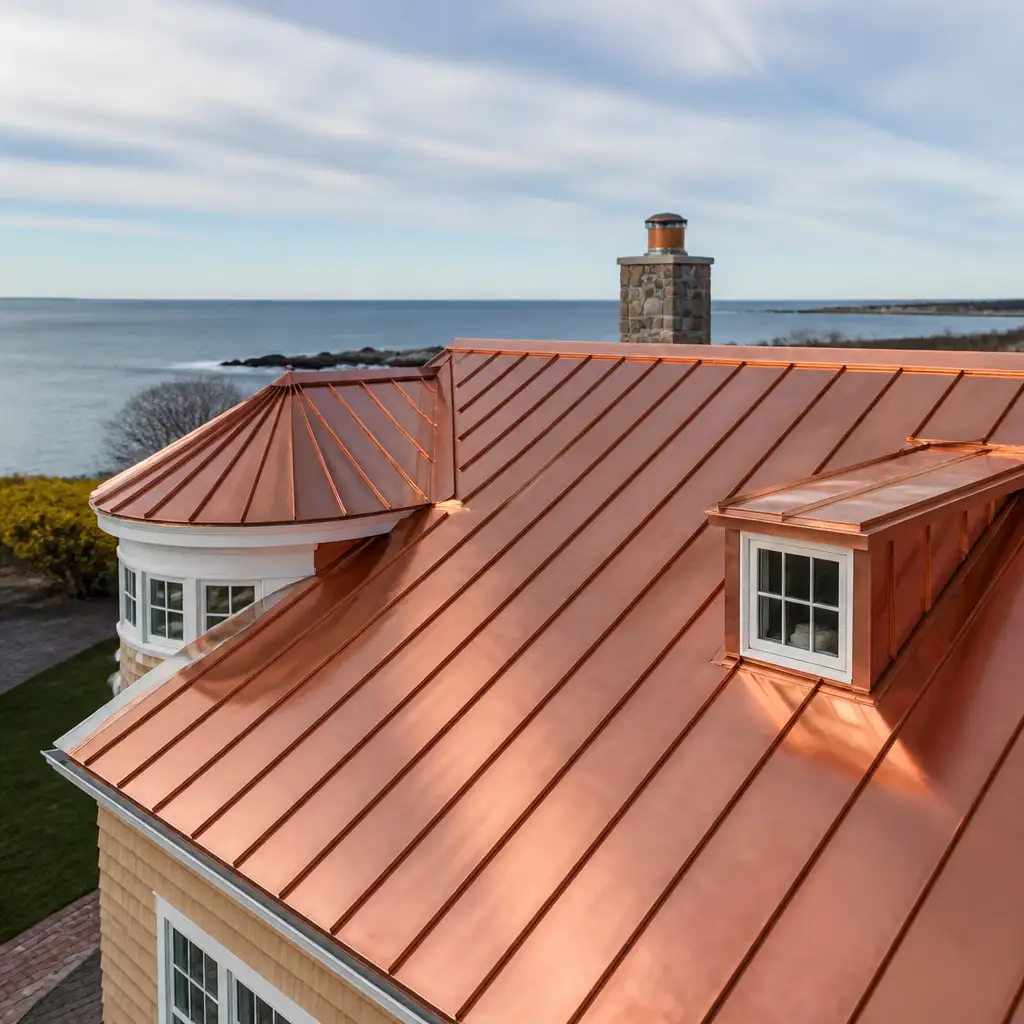
Long-run copper roofing panels are an excellent choice for coastal Massachusetts projects because of copper’s longevity, malleability, and the elegant patina it develops over time. For roofing contractors and architectural metal specialists working on Cape Cod and other New England shorelines, the key to long-term performance is accommodating thermal movement through correct seam selection, attachment strategies, and fabrication-minded detailing.
This article is written for trade professionals — roofing contractors, fabricators, roofing suppliers, and restoration specialists — and focuses on practical, experience-based guidance. It covers the physics of thermal expansion for copper, compares typical seam types, reviews clip systems and attachment strategies, and highlights fabrication-to-installation coordination that reduces field rework and leak risk.
We include recommendations specific to coastal conditions in Southeastern Massachusetts and New England, where wide temperature swings and humid, salty air influence material behaviour. Use this as a technical reference during specification review, shop drawing development, and pre-installation meetings to ensure copper roofing panels behave as intended over decades.
Early on, consult product and detail references such as our roofing panels and flashings page to match panel profiles and flashing options to the detailing strategies discussed below.
- Introduction
- Thermal expansion basics for long-run copper panels
- Choosing seam types for thermal movement and longevity
- Clip systems: sliding, floating, and fixed attachment strategies
- Panel width, thickness and end detailing for long runs
- Fabrication-to-installation coordination and shop detailing
- Durable seam and flashing detailing for Cape Cod coastal conditions
- Frequently Asked Questions
Thermal expansion basics for long-run copper panels
Copper has a linear coefficient of thermal expansion of approximately 16.6 µm/m·°C (0.0000092 in/in·°F). In practical terms, a 100-foot run of copper will change length noticeably across seasonal temperature extremes common in Coastal Massachusetts. Designers and installers must calculate expected movement and allow for it in both the panel system and adjacent flashings.
Estimating movement requires the expected temperature range for the project. On Cape Cod, surfaces can see swings from sub-zero winter lows to 80°F summer highs. For a 100-foot length, total movement can be in the order of several inches. Provide the calculation in shop drawings so fabricators and installers use consistent assumptions when planning seams, clip spacing, and expansion joints.
Two practical consequences for contractors: first, avoid rigid, fixed attachments at both ends of long runs; second, ensure that flashings and abutments allow independent movement or are detailed with slotted fasteners or sliding connections. These measures reduce stress on seams and minimise oil-canning or buckling.
Choosing seam types for thermal movement and longevity
Seam selection directly affects a roof’s ability to accommodate movement and resist water intrusion. For long-run copper roofing panels, common seam types include single-lock standing seam, double-lock standing seam (mechanically or hand-locked), and batten or snap-lock systems. Each has trade-offs in terms of fabrication complexity, field labour, and long-term resilience.
Single-lock standing seams are commonly used on long-run panels where some movement is expected and where mechanical seaming equipment can be used. They permit a degree of flexing without concentrating stress at the seam. However, single-lock seams are more dependent on clip design and accurate folding to maintain weathertightness on long runs.
Double-lock standing seams (mechanically or hand-locked) provide a more robust, redundant closure and are often specified on historic restorations or where a higher margin against water ingress is required. Double-lock seams can be less tolerant of repeated thermal cycling unless clips and expansion strategies are correctly implemented.
For coastal projects, prioritise seam profiles that allow easy field inspection and access for repair, and discuss seam choice with the fabricator early. If a project requires concealed fasteners and a smooth aesthetic, validate that the selected seam profile and clip system will accommodate expected movement without relying on rigid end-anchoring.
Clip systems: sliding, floating, and fixed attachment strategies
Clip selection and layout determine how thermal loads transfer to the substrate. Standard clip strategies include floating/sliding clips, fixed clips, and intermediate clips. Floating and sliding clips allow lateral movement of the panel along its length, while fixed clips secure the panel at discrete points to resist wind uplift. Correct placement and spacing are essential to balance movement and secure attachment.
Designers typically use fixed clips at one end or a set of termination points to anchor the run and sliding clips spaced along the remainder. This anchors the panel while allowing it to expand and contract. Clip spacing depends on panel width, seam type, wind loads, and copper thickness; common spacing ranges from 8″ to 24″ on centre depending on those variables and local code requirements.
Material compatibility is critical in coastal environments. Use stainless steel fasteners with copper panels to avoid galvanic interaction — stainless clips and isolation washers where copper contacts dissimilar metals. Verify clip material and finish with the fabricator to ensure long-term performance in salt air and that clips are sized for the chosen panel profile.
Panel width, thickness and end detailing for long runs
Panel width and gauge (weight) influence thermal movement and stiffness. Wider panels will accumulate more expansion per panel but reduce the number of seams; narrower panels increase seams but reduce per-panel movement. For long-run copper roofing panels, many contractors prefer moderate widths (e.g., 12″–18″ exposed) to balance installation speed, thermal movement, and aesthetic rhythm.
Copper weight choices — commonly 16 oz, 20 oz, or 24 oz in architectural work — affect how the panels resist oil-canning and retain a crisp seam. Heavier gauges are stiffer and better for long runs where wind uplift or substrate irregularities are concerns, but they are heavier to handle in the field and may require different seaming tooling.
End detailing is often overlooked but is crucial. Provide for end laps, transition seams, and expansion joints at low points and terminations. When panels terminate at ridges, gutters, or abutments, ensure the termination allows for movement: slotted fasteners, oversized holes, and sliding cleats at ends reduce stress. For runs exceeding the anticipated practical length, design vertical expansion joints or incorporate standing seam transitions rather than forcing oversized continuous lengths.
Fabrication-to-installation coordination and shop detailing
Successful long-run copper installations start with coordinated shop drawings. Fabricators and installers must agree on assumed temperature baselines, panel lengths, clip types, seam profiles, and flashing details. Early coordination prevents rework and reduces the risk of drainage or movement issues once panels are in place.
Shop drawings should show clip locations, fastener types, and any special fabrication such as pre-formed corner pieces, crickets, or ridge transitions. Include explicit notes on which connections are fixed and which are sliding, and show slotted hole patterns where required. This level of detail allows the fabricator to prefabricate components to the correct tolerances and advise on practicality for field installation.
When working with a trade-only fabricator like Cape Cod Copper, provide measured drawings, expected temperature baselines, and substrate conditions so the shop can produce mating components that minimise onsite trimming. This partnership reduces callbacks, ensures seam geometry matches site conditions, and supports the craftsmanship expected on New England restoration and coastal projects.
Durable seam and flashing detailing for Cape Cod coastal conditions
Coastal Massachusetts exposes materials to salt-laden air and freeze-thaw cycles. Flashings and seams must be detailed for durability: avoid trapping water, allow drainage, and prevent crevice corrosion at interfaces. Use proper lap lengths, backings, and isolation when copper meets dissimilar metals such as stainless, lead, or coated steel.
Specify continuous, weathertight transitions at gutters and downspouts (consider the sequence with copper gutters and downspouts) and ensure step flashing at parapets and chimneys is fabricated to accept movement. For projects where copper interfaces with masonry, provide compressible sealant joints and metal stop cleats that do not restrict lateral movement.
If a job requires additional roof accessories — chimney caps, vents, leader heads — coordinate these with seam locations to avoid localized stress. Refer to product groups such as our vents and chimney caps when planning penetrations and transitions. For quoting or coordination, remember to contact Cape Cod Copper early so fabricator lead times and custom details can be integrated into the project schedule.
Frequently Asked Questions
Q: How much thermal movement should I expect in a 50-foot run of copper panels on Cape Cod?
A: Expect movement on the order of a few tenths of an inch to several inches depending on the temperature range used in calculations. Use the linear coefficient of thermal expansion for copper to calculate expected change and allow for that movement with sliding clips, slotted fasteners, and appropriate seam selection.
Q: Which seam type is best for long-run coastal roofs: single-lock or double-lock standing seam?
A: Both can perform well if detailed correctly; double-lock seams offer added redundancy and are often preferred for restorations, while single-lock seams paired with a robust clip system can be suitable for long runs. The choice should consider expected movement, access for maintenance, and aesthetic requirements.
Q: When should I involve the fabricator in the design process?
A: Involve the fabricator during schematic design and before shop drawings. Early involvement lets the fabricator advise on panel widths, seam profiles, clip types, and fabrication limits, ensuring that shop-fabricated components fit the site conditions and that installation sequencing minimises field adjustments.
Working from drawings, field measurements, or a custom detail? Cape Cod Copper partners with trade professionals to fabricate copper components made to fit the job, from custom flashings and roof panels to leader heads, chimney caps, vents, and decorative architectural details. Call (508) 946-1999 or email capecodcopper2@gmail.com to review your project requirements.