
Introduction
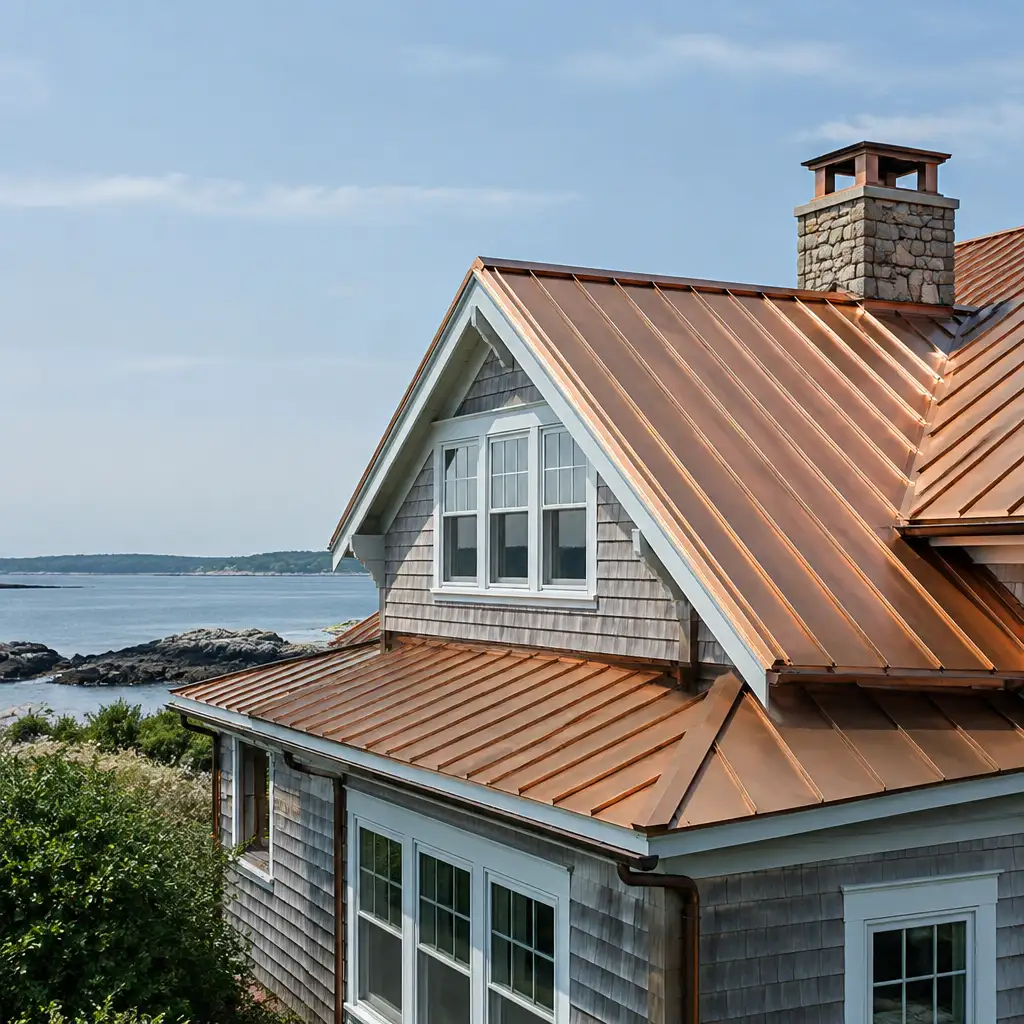
For roofing contractors and architectural metal trades working in Southcoast Massachusetts and coastal New England, integrating standing-seam copper roof panels with contemporary synthetic underlayments requires a disciplined, trade-focused approach. This article addresses practical installation guidance for copper roof panels that balances the metal’s thermal movement, galvanic considerations, moisture control, and the evolving chemistry of modern underlayments. The content is written for contractors, suppliers, and architectural metal fabricators who specify, install, or coordinate copper roofing systems.
We will cover selection criteria for synthetic underlayments, fastener and clip strategies for concealed-clip standing-seam systems, seam detail coordination, and coastal-specific moisture and ventilation measures. Emphasis is placed on reliable workmanship, material compatibility, and coordination between on-site installation and shop-fabricated copper components. Wherever helpful, the guidance references fabrication and accessory components you may obtain through established trade partners.
Cape Cod Copper provides fabrication and detailing experience tailored to roofing contractors and suppliers across Massachusetts and New England; this article reinforces those contractor-oriented best practices without addressing retail or DIY audiences. Expect practical, specification-ready recommendations grounded in real-world coastal construction conditions.
Key takeaways include anchoring strategies that accommodate copper’s thermal expansion, underlayment choices and attachment methods that avoid chemical incompatibility, seam and transition detailing to preserve watertightness, and ventilation solutions appropriate for Southcoast climates.
- Introduction
- Choosing Synthetic Underlayments Compatible with Copper Roof Panels
- Fastener Strategies for Standing-Seam Copper Panels
- Seam Detail Coordination Between Panels and Underlayments
- Moisture Control and Vapor Management on Coastal Projects
- Ventilation, Airflow, and Thermal Movement Considerations
- Shop-Fabrication, Site Coordination, and Quality Control
- Frequently Asked Questions
Choosing Synthetic Underlayments Compatible with Copper Roof Panels
Selecting a synthetic underlayment for copper roof panels starts with chemistry and product properties. Modern synthetic underlayments are typically constructed from polypropylene, polyethylene, or engineered nonwoven fabrics laminated with polymeric films. For copper roofs, prioritize underlayments that are free of aggressive chemical additives—specifically those known to accelerate corrosion in metals—have stable slip surfaces, and maintain long-term dimensional stability when exposed to UV during staging.
Contractors should consult manufacturer data sheets for polymer composition and any migration risks. When in doubt, request manufacturer statements or compatibility tests showing no sulfur-based or acidic additives that could interact with copper over time. For many standing-seam copper installations on solid deck, high-performance polyethylene-based synthetic underlayments with low permeability are acceptable when combined with appropriate ventilation strategies.
Also consider underlayment attachment methods. Self-adhering ice-and-water membranes remain essential at eaves, rakes, and around penetrations in coastal Massachusetts projects where wind-driven rain and ice are concerns. Use self-adhering membranes only where specified and ensure they terminate correctly beneath planned copper flashings. For guidance on copper components and transition details, reference roofing panels and flashings to coordinate material interfaces with fabricated copper flashings and trims.
Fastener Strategies for Standing-Seam Copper Panels
Standing-seam copper roofs are normally secured with concealed clip systems that fasten through the underlayment into the roof deck. Clips must be specified to allow longitudinal movement of copper panels while resisting lateral loads. Use clips designed for copper roofs—either copper clips or stainless steel clips with proper isolation—to avoid galvanic corrosion where dissimilar metals meet. Avoid aluminum clips or fasteners in direct contact with copper.
Fasteners into wood decks should be stainless steel (Type 316 where coastal exposure is significant) with sufficient embedment and thread engagement for the local wind uplift requirements. For nail-on or face-fastened accessories, use stainless steel fasteners and neoprene or EPDM washers to maintain a durable seal. When fastening through synthetic underlayment, ensure fasteners have adequate washers and use sealing washers for exposed penetrations; concealed clip penetrations rely on the underlayment’s integrity and proper flashing at transitions.
Where design requires occasional face-fastening (for flashings, counterflashing cleats, or trim), use fasteners that are compatible with copper and include an isolation strategy: non-metallic washers, painted stainless fasteners, or small copper shims where appropriate. Coordinate fastener spacing and clip placement with the panel layout so seams are supported without over-constraining the copper’s thermal movement.
Seam Detail Coordination Between Panels and Underlayments
Seam details are where copper roof panels and modern underlayments must be carefully coordinated. Standing-seam systems rely on continuous seams and often conceal fasteners under the seam ribs; underlayment laps, cutbacks, and transitions should not create voids or channels that direct water toward seams. Plan underlayment laps to step under panel seams and ensure mechanical clips are positioned over solid deck where possible.
Where seams abut penetrations, terminations, or transitions to other roofing materials, coordinate the details in advance with shop-fabricated flashings. Step flashings, chimney counterflashings, valley terminations, and ridge transitions should be detailed so that the underlayment provides the secondary weather barrier without interfering with mechanically seamed joints. Shop-fabricated copper flashings often require field-fit interfaces; provide panel and seam dimensions to the fabricator to minimize on-roof modification.
Use slip-detail strategies at transitions where panels meet vertical surfaces: a thin separation layer or engineered flange detail can prevent abrasion of the underlayment during thermal movement. Sealing materials used at transitions should be compatible with copper and approved by both underlayment and metal suppliers. When specifying seam heights and clip types, confirm that the underlayment does not impede proper seaming clearance or clip engagement.
Moisture Control and Vapor Management on Coastal Projects
Southcoast Massachusetts projects confront high humidity, salt spray, and occasional driving rain. Moisture control combines correct underlayment selection with robust drainage details and ventilation. Synthetic underlayments help shed incidental moisture, but they are not a substitute for proper drainage planes and flashings. Use self-adhering membranes at vulnerable eaves and penetrations, and ensure proper laps and terminations beneath copper drip edges and gutters.
Vapor management is equally important. In retrofit situations where insulation is added, ensure the roof assembly handles indoor vapor drive in winter and potential condensation in shoulder seasons. For cold-climate buildings, maintain continuous air barriers below the roof deck and provide a ventilated cavity where possible to keep the panel underside above dew point. When a ventilated airspace is not practical, choose underlayments and moisture-management strategies supported by the building enclosure design.
For rainwater handling, coordinate copper roof panels with copper gutters and downspouts to maintain a single-metal drainage path where feasible. Properly sized gutters and well-detailed leader connections help prevent splash-back and salt concentration at panel bases—both of which accelerate wear in coastal settings. When designing drainage, think in terms of the whole system from panels to flashings to gutters to ensure long-term performance.
Ventilation, Airflow, and Thermal Movement Considerations
Ventilation is a central control for condensation and thermal regulation under copper roof panels. A continuous ventilated airspace beneath the panels reduces the risk of condensation forming on the panel undersides and assists with drying after intrusion events. Typical solutions include perforated or continuous ridge vents paired with soffit intake vents sized to meet the roof area and insulation levels.
When using synthetic underlayments, allow for an intentional air gap between the underlayment and panel where details and structure permit. This gap aids convective flow and minimizes thermal gradients that can intensify cyclic movement. Copper expands and contracts considerably; clips and fasteners must accommodate this movement without loosening or causing panel distortion.
Integrate ventilation details with other rooftop components—penetrations, roof hatches, and rooftop-mounted equipment all influence airflow. Discuss ventilation interfaces early with the mechanical and roofing teams and reference copper roof vents and other ventilation components when specifying penetrations or shop-fabricated assemblies. Proper coordination at the design stage avoids field modifications that can compromise both ventilation and weatherproofing.
Shop-Fabrication, Site Coordination, and Quality Control
Successful copper roofing installations require tight coordination between shop-fabricated components and field installation. Provide accurate measured drawings, seam profiles, clip layouts, and substrate information to the fabricator so that panels, flashings, and accessory pieces fit as intended. Cape Cod Copper partners with contractors to produce precision components when drawings or field measurements are provided; this reduces on-roof adjustments and preserves the integrity of underlayment and seam details.
Inspect the substrate and underlayment installation before panel placement. Confirm deck flatness, fastener locations, and that underlayment laps are correct in areas where seams and clips will be installed. A pre-installation checklist that includes fastener type, clip torque recommendations, and seam equipment settings provides a consistent quality-control baseline for field crews and helps prevent installation errors that are difficult to correct after panels are seamed.
Trade coordination extends to accessory items. Ensure that fabricated gutters, downspouts, and leader heads are sized and located to accept copper runoff without undue splash or salt concentration. When necessary, contact Cape Cod Copper early to discuss custom details or to request shop-fabricated flashings and transition pieces; timely fabrication and clear specifications save time on site and reduce material waste. If you need to discuss fabrication timelines or custom details, please contact Cape Cod Copper to review project requirements.
Frequently Asked Questions
Q: Can I install copper roof panels directly over modern synthetic underlayments without a slip sheet or separation layer?
A: In many installations, copper roof panels can be installed directly over high-quality synthetic underlayments, provided the underlayment is chemically compatible and the clip system is designed to allow movement. However, in some cases—where manufacturer compatibility is uncertain or where the underlayment surface could abrade the panel flange—a thin separation layer or specified slip detail is prudent. Verify compatibility with underlayment and metal suppliers before installation.
Q: What fasteners and materials should be avoided to prevent galvanic corrosion with copper panels in coastal Massachusetts?
A: Avoid aluminum fasteners and components that will be in direct contact with copper. Use stainless steel (Type 316 where salt exposure is likely) or copper-compatible stainless clips and fasteners, and include isolating materials where dissimilar metals must be adjacent. Proper drainage and avoidance of trapped saltwater at interfaces also reduce corrosion risk.
Q: How should ventilation be handled for standing-seam copper roofs to minimize condensation risk?
A: Provide a continuous ventilated airspace beneath panels when possible, with balanced intake at soffits and exhaust at ridges or other high points. Pair ventilation with appropriate insulation and air-barrier strategies below the deck to control vapor drive. When design constraints prevent traditional ventilation, consult building enclosure specialists to choose suitable underlayments and vapor control measures.
Working from drawings, field measurements, or a custom detail? Cape Cod Copper partners with trade professionals to fabricate copper components made to fit the job, from custom flashings and roof panels to leader heads, chimney caps, vents, and decorative architectural details. Call (508) 946-1999 or email capecodcopper2@gmail.com to review your project requirements.