
Introduction
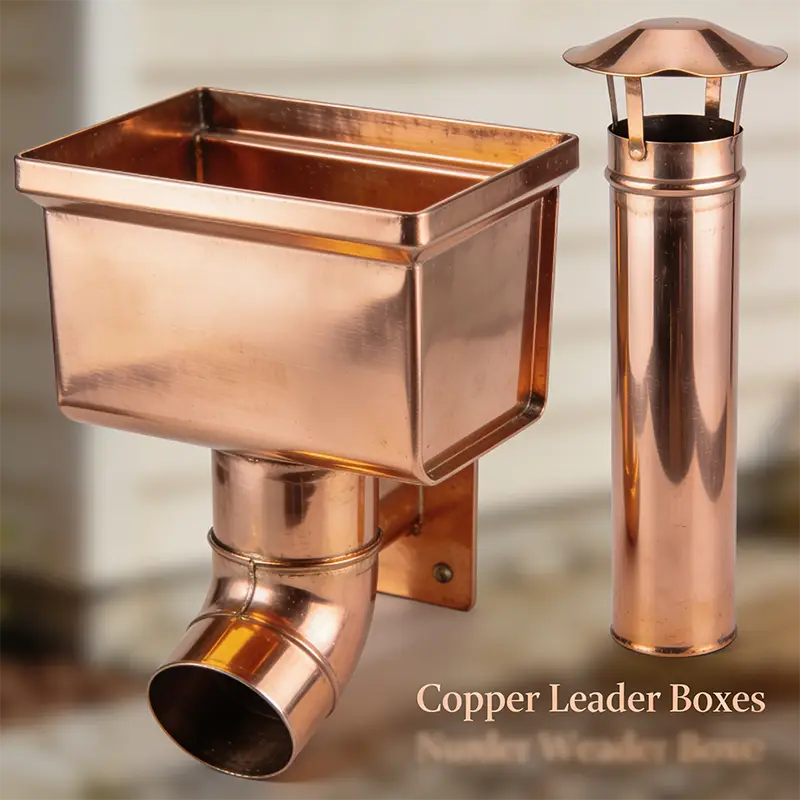 Copper leader boxes and leader heads remain essential components in roof drainage systems for historic and new construction across Massachusetts. This guide is written for roofing contractors, suppliers, and restoration specialists who need practical, trade-focused direction when designing, specifying, and ordering copper leader boxes and leader heads for projects in Coastal Massachusetts and New England.
We will cover the technical calculations contractors use to size leader heads, overflow and flow calculations, material selection between 16, 20 and 24 oz copper and lead-coated options, plus shop-drawing and fabrication requirements for production from measured drawings. The guidance emphasises real-world details — mounting and flashing integration with gutters, soldering and seaming methods, common fabrication mistakes to avoid, and considerations for historic reproduction and coastal durability.
Readers will find sample specification language suitable for use in purchase orders and bid packages and practical shop-drawing checklists to reduce RFIs and rework. Cape Cod Copper works exclusively with trade professionals and provides custom fabrication and historic reproduction capabilities for contractors in Massachusetts; the procedures below reflect that trade-only, contractor-first perspective.
Key takeaways include how to calculate peak flows to size leader heads correctly, choosing the appropriate copper gauge for structural and coastal demands, and what to include in shop drawings so fabrication and installation proceed smoothly.
- Introduction
- Sizing, Overflow and Flow Calculations
- Material Selection: 16, 20, 24 oz and Lead-Coated Options
- Fabrication from Measured Drawings & Shop-Drawings Requirements
- Soldering, Seaming Methods and Common Fabrication Mistakes
- Mounting, Flashing Integration with Gutters and Coastal Durability
- Historic Reproduction Considerations and Specification Language
- Frequently Asked Questions
Sizing, Overflow and Flow Calculations
Proper sizing of copper leader boxes and leader heads starts with an accurate drainage-area calculation and a chosen design rainfall intensity. For trade use, determine the roof area draining to the leader head in square feet and use the project-specific or local design rainfall intensity. A commonly used engineering conversion that contractors use on jobs is:
Peak flow (GPM) = Drainage area (ft²) × Rainfall intensity (in/hr) × 0.623 ÷ 60
For example, a 1,000 ft² roof area at 2 in/hr yields roughly 20.8 GPM. Once you have peak GPM, select a leader head mouth and throat geometry that can pass that flow with headroom for wind-driven rain and debris. Manufacturer tables or a shop can convert required GPM into mouth area and throat dimensions; when in doubt, size up to provide an emergency overflow route.
Overflow detailing is critical in New England where convective storms and coastal events can produce bursts of rainfall. Provide an overflow weir or bypass that directs excess water away from vulnerable wall surfaces and into adjacent gutters or scuppers. Document the elevation of the overflow relative to the gutter connection and include a minimum freeboard — typically one to two inches — between the design throat elevation and the overflow weir to ensure predictable behaviour during surcharge events.
Material Selection: 16, 20, 24 oz and Lead-Coated Options
Specifying the correct copper gauge affects fabrication detail, longevity, and how the piece integrates with the building. Lighter gauges (commonly called 16 oz) are suitable for small decorative leader heads and finials where weight and formability matter. Twenty-ounce copper is the workhorse for functional leader heads and boxes — it balances stiffness and formability. For larger leader boxes, heavy-duty leader heads, and applications exposed to high wind or mechanical loading, 24 oz is preferred for structural rigidity and long-term shape retention.
Lead-coated copper offers advantages for some restoration projects: the lead coating eases soldering, fills pores on older surface finishes, and can provide a sacrificial layer where dissimilar metals meet. It is commonly specified for historic reproduction work where original fabric used lead-coated materials. Confirm regulatory and project-specific restrictions in your contract documents before specifying lead-coated materials.
Make material selection explicit in the specification: list base metal, ounce weight, acceptable mill finish or pre-patinated finish, and whether lead coating is required. This eliminates ambiguity on shop drawings and helps the fabricator recommend seam and soldering methods appropriate to the chosen gauge.
Fabrication from Measured Drawings & Shop-Drawings Requirements
Fabrication from measured drawings demands clear, dimensioned shop drawings. A complete shop drawing package for a leader head or box should include: elevation and plan views, throat and outlet dimensions, mouth opening geometry, seam and seam allowance details, connection details to downspouts or gutters, mounting attachments, and reference to material gauge and finish.
Include callouts for soldering or seaming method (for example, fully soldered seams versus lock-seamed and soldered at lap points), specify any stiffeners or internal drains, and show required clearances for flashing or counterflashing. If the leader head ties into an existing cornice or moulding, provide measured field templates or photographs with annotated dimensions so the fabricator can reproduce profiles accurately.
Providing a complete set of shop drawings up front prevents common delays. If historical match is needed, include photos, measured profiles, and a sample approval process. Cape Cod Copper routinely fabricates from measured drawings for restoration jobs, and a thorough shop drawing package will reduce revision cycles and speed production.
When appropriate, reference related roof details such as flashings and transitions to ensure compatibility; see our roofing panels and flashings resources for coordinated interfaces with roof terminations and step flashing where leader boxes meet the roof plane: roofing panels and flashings.
Soldering, Seaming Methods and Common Fabrication Mistakes
Selecting the correct seam and soldering approach depends on gauge and expected movement. Common seam methods for leader heads include folded lock seams, single or double hemmed seams, and fully soldered laps where a watertight joint is required. For larger assemblies, provide flanged connections where the head meets a downspout to permit disassembly and maintenance.
Best-practice soldering includes thorough cleaning, appropriate flux for copper, and control of heat to avoid overheating the metal or adjacent finishes. For lead-coated copper, follow the fabricator’s recommended soldering practice and flux to avoid compromising the coating. Use mechanically secure seam details in addition to solder to maintain structural integrity under wind and thermal cycling.
Common fabrication mistakes to watch for include undersized outlets or throat areas, missing overflow provisions, insufficient allowance for thermal expansion, and unclear attachment details that transfer stress to the building rather than to the hanger or bracket. Another frequent issue is failing to specify fastening materials — use stainless steel fasteners and isolation where copper will contact dissimilar metals to prevent galvanic corrosion.
Mounting, Flashing Integration with Gutters and Coastal Durability
Leader boxes and heads must integrate cleanly with existing gutter and downspout systems. Detail the outlet transition: throat diameter, spigot length, required offsets, and whether the connection is welded, soldered, or slip-fit with a clamp. When connecting to half-round or ogee gutters, ensure the leader head mouth and outlet align with the gutter’s flow path and include a debris diverter if necessary.
Specify mounting brackets, straps, or back-pans in the shop drawings. Where leader heads attach to fascia or cornice, provide backing plates or blocking dimensions so the installer can anchor the assembly without damaging decorative millwork. For new construction, coordinate the framing subcontractor to provide solid nailing blocks at specified locations.
Coastal Massachusetts conditions demand attention to wind-driven rain, salt exposure, and thermal cycling. For coastal durability specify heavier gauges such as 20 oz or 24 oz, lead-coated options where appropriate, and non-ferrous isolation washers when stainless fasteners meet copper. Secure fixing patterns and added stiffening reduce movement and noise during storms. For gutter and downspout compatibility, coordinate with your gutter supplier and use proven gutter transitions: copper gutters and downspouts.
Historic Reproduction Considerations and Specification Language
Historic reproduction projects require careful matching of profile, gauge, and finish. Ask for measured profiles of existing leader heads and finials; where originals are missing or damaged, use photographic and field evidence to establish proportions. Maintain original throat and mouth dimensions when possible to preserve drainage behaviour and appearance.
When preparing orders or RFQs, include clear specification language. Below is sample text contractors can adapt when ordering custom leader heads from a fabricator:
Sample specification: Furnish and fabricate custom copper leader head(s) as indicated on shop drawings. Material: solid copper, ASTM standard, 20 oz (or specified 16/20/24 oz) mill finish unless lead-coated copper is specified. All seams to be continuous lock-seamed and fully soldered at major seams. Provide outlet spigot sized to receive specified downspout and include 2-inch overflow weir above throat. Finish: mill finish for natural patina; pre-patina only if specified. Include shop drawings for approval prior to fabrication. Delivery to fabricator within X weeks of approved drawings.
Include procurement notes: required lead time, project contact for approvals, who provides field templates, and packaging/labeling for trade delivery. Reinforce trade-only terms and fabrication capabilities when you submit documents — Cape Cod Copper is a trade-only fabricator and partners with roofing contractors and suppliers to deliver production and one-off custom components: leader boxes and finials.
Finally, request mock-ups for historically significant pieces and agree on acceptance criteria for fit and finish before finishing production runs. If coordination with roofing flashings is required, supply roof transition details and flashing profiles to the fabricator or request support coordinating with your roofer: contact Cape Cod Copper to discuss shop drawing coordination and mock-up requirements.
Frequently Asked Questions
Q: What gauge copper should I specify for a large historic leader box?
A: For large or structural leader boxes exposed to wind and mechanical loading, 24 oz is commonly specified for stiffness and longevity. Use 20 oz for standard functional leader heads and 16 oz for decorative, smaller components. Always indicate the required gauge in the shop drawings.
Q: How do I ensure a leader head will handle peak flows during heavy storms?
A: Calculate peak flow using the drainage area and local design rainfall intensity, convert to GPM, and select a mouth/throat geometry rated above that flow with additional capacity for wind-driven rain and debris. Include a documented overflow weir and routing to protect adjacent surfaces.
Q: What should be included on shop drawings to avoid fabrication errors?
A: Provide scaled plans and elevations, throat and outlet dimensions, seam types, material gauge and finish, mounting and blocking details, tolerance notes, and connection details to gutters or downspouts. Attach measured templates or photos for historic work and specify approval steps before fabrication.
Working from drawings, field measurements, or a custom detail? Cape Cod Copper partners with trade professionals to fabricate copper components made to fit the job, from custom flashings and roof panels to leader heads, chimney caps, vents, and decorative architectural details. Call (508) 946-1999 or email capecodcopper2@gmail.com to review your project requirements.