
Designing copper gutter and downspout systems for historic buildings on Cape Cod — Copper gutters Massachusetts
Introduction
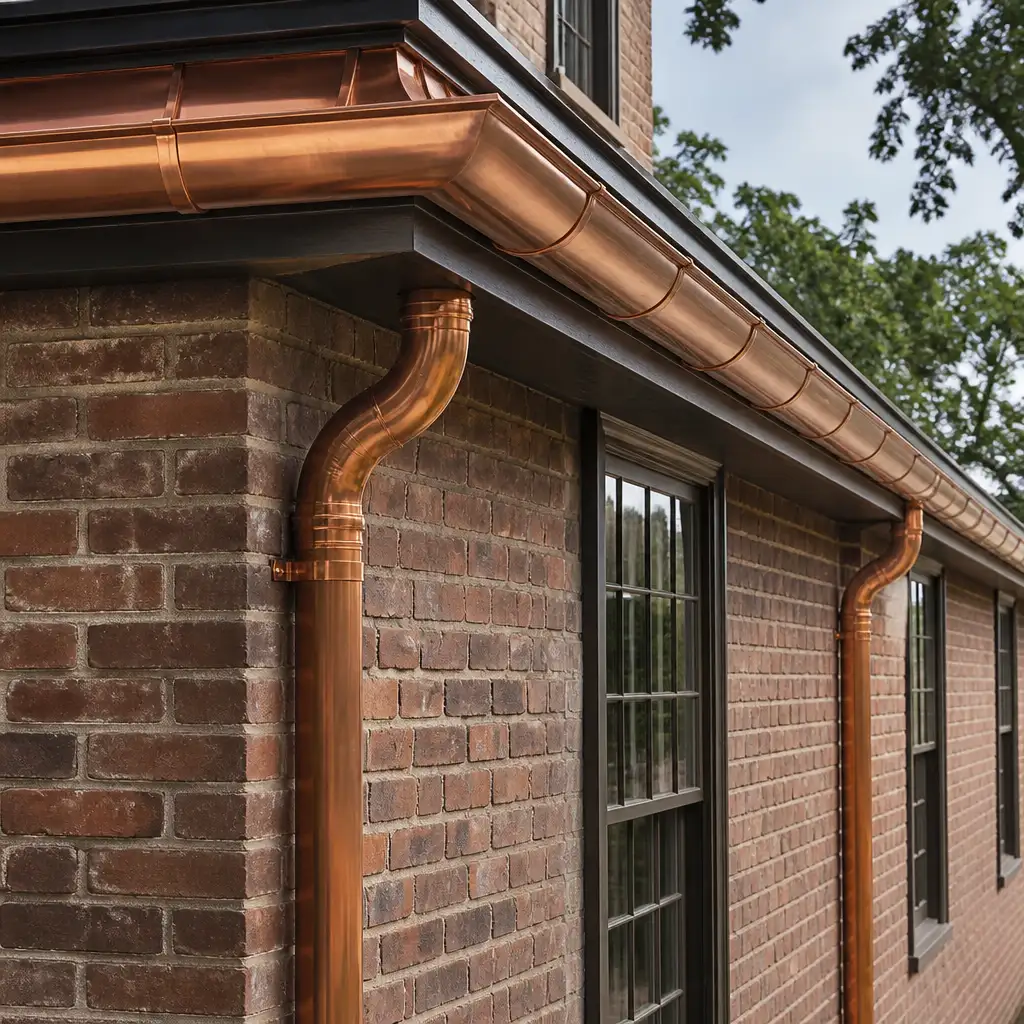
Historic buildings across Cape Cod and coastal Massachusetts demand rainwater systems that respect original profiles while meeting modern performance requirements. For preservation contractors and roofing trades, specifying and installing copper gutters requires balancing authenticity with capacity, durability in a marine environment, and coordination with other trades. This guide focuses on practical design and specification advice for copper gutters Massachusetts projects, geared to roofing contractors, preservation specialists and architectural metal fabricators.
We cover matching common historic profiles such as half-round and ogee, calculating gutter and downspout sizing for stormwater loads typical of New England weather, leader head placement and detailing, corrosion considerations near salt air, and shop-fabrication practices for accurate replicas. The technical guidance here is drawn from on-the-job experience in New England restoration work and shop fabrication practices used by trade-only copper suppliers.
The recommendations assume collaboration between roofing contractors, preservation architects and masonry trades on period buildings. For trades seeking fabricated components, partner relationships with an architectural copper fabricator can streamline layout, produce precise profiles, and ensure field-fit accuracy. Cape Cod Copper operates exclusively with professional trades and can fabricate accurate components from measured drawings, photographs, or field templates.
Key takeaways: preserve historic profiles, size for full stormwater loads, position leader heads to control flow, select copper thickness appropriate to exposure, and plan shop layout to reduce field rework. Read on for section-by-section practical guidance and fabrication tips suited to Cape Cod and coastal Massachusetts conditions.
- Introduction
- Matching historic profiles: half-round and ogee gutters
- Sizing gutters and downspouts for New England stormwater loads
- Leader heads, boxes and placement strategies
- Corrosion and marine-environment considerations
- Shop-fabrication tips for accurate historic replicas
- Material selection and coordination with masonry trades
- Frequently Asked Questions
Matching historic profiles: half-round and ogee gutters
Historic New England buildings most commonly used half-round and ogee gutter profiles. Half-round gutters read correctly on classical cornices and simpler rooflines; ogee gutters suit more ornate eaves and mimic 19th-century cast-iron or painted wood profiles. When restoring an existing building, the objective is to match sightlines and drip edges while maintaining adequate capacity.
Field measurement is critical. Take templates at multiple points along the eave to capture any tapering or irregularities. If original gutters are missing or damaged beyond measurement, use historic photos, cornice moulding dimensions and proportional geometry from adjacent trim to establish an accurate profile. Fabrication from measured drawings or templates reduces on-site adjustment and preserves period appearance.
Select forming methods appropriate to the profile. Half-round gutters are efficiently roll-formed or seamed from 16 oz (0.064″) or 20 oz (0.080″) copper depending on span and exposure; ogee profiles often require radius forming and precise mitering at returns. For contractors wanting fabricated components rather than on-site forming, consult a specialist on options and tolerances. For product examples and accessory options, review the Cape Cod Copper category for copper gutters and downspouts to determine compatible hangers, outlets and end caps.
Sizing gutters and downspouts for New England stormwater loads
Sizing should be calculated using projected roof area, rainfall intensity for the region and gutter slope. In coastal Massachusetts, use conservative rainfall intensities to account for high-intensity summer storms and nor’easter-driven precipitation. As a rule, do not undersize historic-profile gutters for authenticity at the expense of capacity—period profiles can be fabricated at larger dimensions to preserve appearance while increasing capacity.
Practical steps: determine the tributary area for each gutter run, then select a gutter cross-sectional area that handles the local rainfall intensity. When retaining half-round profiles, increasing diameter by one nominal size (for example, from 5″ to 6″) can substantially increase capacity without altering visual character. Similarly, for ogee gutters, increase the depth or back height to gain capacity while keeping the face profile intact.
Downspout sizing and spacing should follow the gutter capacity calculation. Use larger downspouts or multiple outlets at regular intervals for long runs and areas with high runoff. Avoid placing outlets directly at corners where flow concentrations and splash-back can cause masonry staining; use leader heads to moderate flow where appropriate. Labour and installation considerations: specify outlet types and downspout transitions clearly in the contract documents so the fabricator prepares matching offsets and connection details for a smooth field installation.
Leader heads, boxes and placement strategies
Leader heads (also called leader boxes or conductor heads) are both functional and architectural. On historic buildings they should be positioned to reflect original details and to control flow from wide roof areas into vertical conductors. Leader heads allow overflow capacity, act as debris catchers and provide an architectural focal point when crafted with period-appropriate proportions.
Placement strategy: install leader heads at regular intervals where multiple roof planes intersect, at the terminus of long eave runs, and above anticipated downspout locations. Where masonry or foundation vulnerabilities exist, position leader heads to discharge away from sensitive walls, or direct downspouts to storm drains. When in doubt, lay out leader heads on a scaled elevation drawing to confirm sightlines and proportional spacing before shop fabrication.
For historic restorations, coordinate leader head design with fabricated decorative elements. Fabricate leader heads in thickness consistent with gutters and match jointing methods (soldered seams versus seamed with concealed fasteners). For specialised components and ornamental leader heads, consult a fabricator experienced in historic reproduction; examples of bespoke options and finishes can be found in the Cape Cod Copper leader boxes and finials product category.
Corrosion and marine-environment considerations
Copper performs well in coastal settings, but specification must account for salt-laden air, airborne pollutants and galvanic interactions with adjacent materials. Use heavier gauge copper in exposed locations to resist abrasion and wind-borne grit; 20 oz or 24 oz copper is common on exposed rooflines and prominent gutters. Consider lead-coated copper where enforced contact with other metals is unavoidable; lead-coating can prevent direct galvanic corrosion between copper and certain stone or mortar conditions.
Detailing matters: isolate copper from dissimilar metals using non-conductive washers, lead boards, or painted flashings to prevent accelerated corrosion of adjacent materials. Avoid direct contact with untreated steel or iron; if structural hangers or anchors are steel, they should be hot-dip galvanised and isolated. Where stone or masonry contains salts, ensure flashings and gutter interfaces are detailed to prevent salt migration and staining. Regular inspection and maintenance schedules should be specified in restoration contracts to catch early signs of deterioration.
Patination and cleaning: expect natural patination over time in coastal Massachusetts environments. If a project requires accelerated patina or preservation of a particular finish, specify factory pre-weathering or approved chemical patination processes and confirm their compatibility with long-term performance. For preservation-sensitive work, document finish expectations in the project specifications to align shop and field expectations.
Shop-fabrication tips for accurate historic replicas
Precision in the shop reduces field time and ensures faithful reproduction of historic details. Produce accurate templates and shop drawings from scaled elevations, measured drawings, or field templates. For ogee gutters and ornamental leader heads, build full-size patterns whenever possible. Use controlled forming equipment—roll formers, break presses and CNC profiling—to maintain consistent radii and profiles across a run.
Specify seams and jointing methods on drawings. Historically, many copper gutters used soldered lap seams; modern practice can include seamed joints with concealed fasteners or brazed assemblies depending on access and exposure. Record tolerances for mitres, end returns and hanger spacing so installers know where field adjustments are acceptable. Where discreet fasteners are required for preservation authenticity, note that in the fabrication instructions.
Include clear shop marks and match lines on fabricated pieces to aid installation and coordination with roofing crews and the masonry trades. Pre-fit components where possible—leader heads to downspouts, gutter mitres to end returns—so that the roof crew receives job-ready assemblies. A trade-only fabricator accustomed to restoration work will prepare components with installation notes and fitment marks, reducing onsite customisation and preserving historic proportions.
Material selection and coordination with masonry trades
Material choices should reflect exposure, desired longevity and interaction with adjoining materials. Common thicknesses for architectural copper gutters in Massachusetts restoration work range from 16 oz for less exposed areas to 24 oz for high-exposure cornices and public buildings. Lead-coated copper is an option where contact with masonry or steel risks galvanic action. Be explicit in specifications about thickness, finish (mill finish or pre-patinated), and acceptable fabrication tolerances.
Coordinate early with masonry contractors on attachment points, anchor locations and flashing transitions. Historic masonry often requires careful anchorage patterns to avoid new penetration of long-established mortar beds. Where anchor plates are required, specify non-corrosive substrates and isolation layers between copper and masonry. Detail through-wall scuppers, roof-to-wall flashings and gutter supports in the contract documents so that fabricators can pre-punch, form and fit components correctly.
Plan scope and sequencing: determine whether gutters will be installed before or after repointing or stone repairs to avoid rework. Include clearance for mortar rake-back and set-back requirements in the fabrication drawings. Trade coordination reduces touch-ups and ensures the final assembly meets both preservation standards and long-term performance expectations. For integrated copper roofing details and flashings, align gutter transitions with other copper roofwork to maintain consistent gauge and finish across the roofline; consult roofing panel and flashing specifications when planning adjacent details.
Frequently Asked Questions
Q: What copper thickness is appropriate for half-round gutters on a historic municipal building?
A: For exposed municipal or public buildings in coastal Massachusetts, specify 20 oz or 24 oz copper to resist abrasion and wind exposure. For less exposed residential eaves, 16 oz is commonly used. Always balance historic appearance with structural demands and coordinate thickness with the fabricator.
Q: How should leader heads be integrated with masonry to avoid staining and salt damage?
A: Position leader heads to discharge away from vulnerable masonry when possible. Provide drip details, isolated anchor plates and non-corrosive downspout shoes or splash blocks. Use lead-coated copper or isolation layers where copper contacts salt-bearing stone or mortar to reduce staining and galvanic effects.
Q: Can custom ogee gutters be shop-fabricated to match irregular historic cornice lines?
A: Yes. Accurate templates or measured drawings allow shop-forming of ogee profiles with consistent mitres and returns. Pre-fit critical joints in the shop, provide installation match lines and coordinate hanger spacing with the roofing contractor to fit irregular cornices on site.
Working from drawings, field measurements, or a custom detail? Cape Cod Copper partners with trade professionals to fabricate copper components made to fit the job, from custom flashings and roof panels to leader heads, chimney caps, vents, and decorative architectural details. Call (508) 946-1999 or email capecodcopper2@gmail.com to review your project requirements.