
Introduction
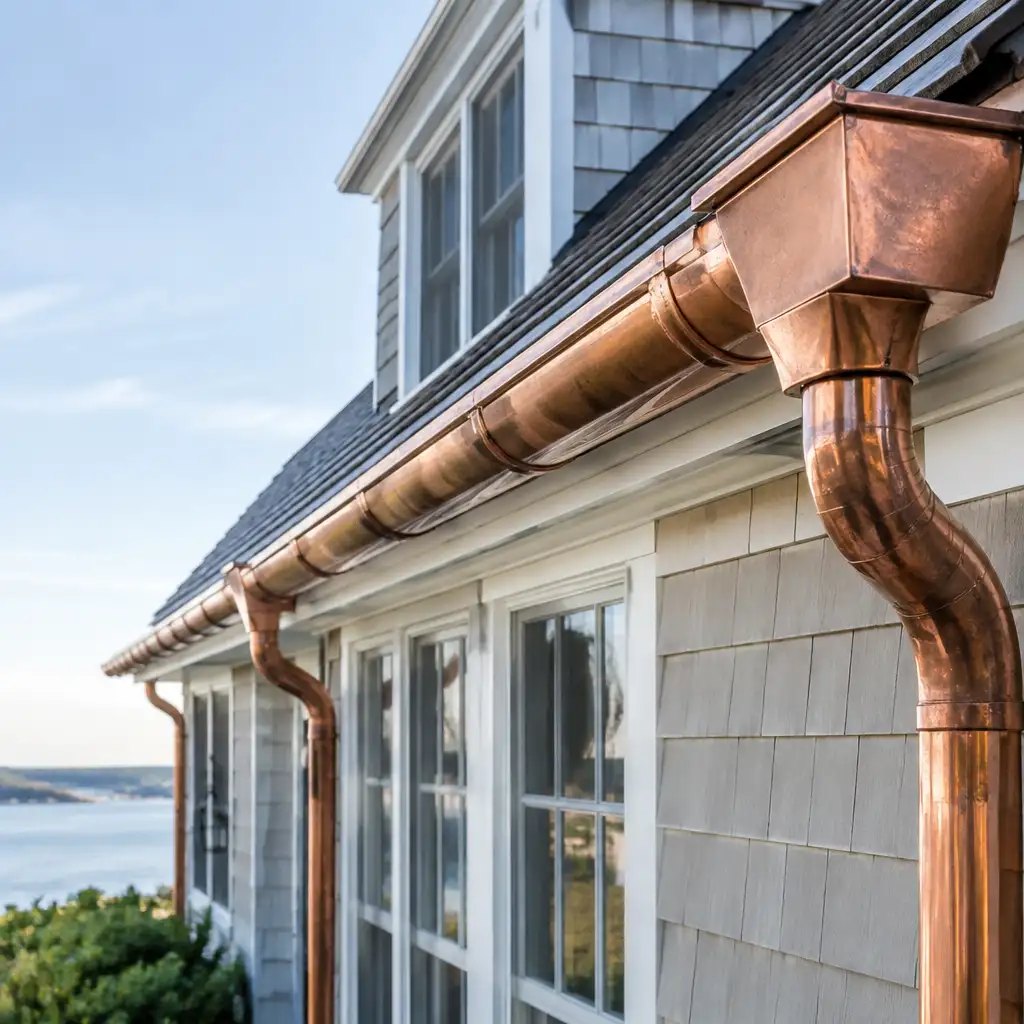
Designing stormwater management on coastal buildings requires a trade-focused approach that accounts for heavy rainfall, wind-driven water, and historic architectural details. For roofing contractors and metal trades on Cape Cod and throughout Coastal Massachusetts, specifying and fabricating robust copper drainage components—scuppers, overflow routes, leader heads, and copper downspouts—is essential to protect facades, cornices, and foundations.
This article provides practical design and fabrication strategies for integrating scuppers, overflow paths, leader heads, and downspouts into comprehensive rainwater systems. It uses methods you can apply on-site or in detailing sessions, and it highlights copper-specific considerations that matter in New England’s coastal environment. The target keyword “Copper gutters Massachusetts” is addressed in a technical, contractor-oriented context throughout the piece.
Readers should expect actionable sizing guidance, layout strategies to resist wind-driven rain, and fabrication notes relevant to trade partners. Where practical, we call out when to verify capacities against local codes or manufacturer charts and when to move from rules of thumb to calculated designs.
Cape Cod Copper is a family-owned, trade-only copper fabricator serving roofing contractors and suppliers across Massachusetts and New England. Our recommendations reflect architectural sheet metal experience, precision fabrication capabilities, and common practices used on Cape Cod coastal projects.
- Introduction
- Scupper Placement and Sizing for Coastal Rooflines
- Designing Effective Overflow Paths and Emergency Drainage
- Leader Head Selection, Function, and Sizing Guidance
- Downspout Layout, Sizing, and Wind-Driven Rain Considerations
- Fabrication & Detailing: Copper Options, Joints, and Roof Connections
- Installation Coordination: Roofers, Flashing, and Trade Responsibilities
- Frequently Asked Questions
Scupper Placement and Sizing for Coastal Rooflines
Scuppers are primary discharge points where roof water must pass through a parapet or wall. On Cape Cod vernacular and many historic buildings, scuppers are also architectural features—so their position and throat size must reconcile aesthetics, capacity, and corrosion-resistant detailing. Locating scuppers requires reviewing roof plan drainage basins and anticipated flow during intense coastal storms.
Start by identifying roof catchment basins and the highest probable waterline under blockage or ice conditions. Scuppers should be placed at the low points of basins and at predictable overflow elevations. Where parapets are continuous, provide primary scuppers and secondary emergency scuppers spaced to ensure no single basin can over-top critical elements.
For sizing, calculate the expected flow using local rainfall intensity or a conservative design intensity and the roof catchment area. As a practical trade method, verify scupper throat area equals or exceeds the combined inlet areas that drain to it. Where multiple scuppers drain to a leader head, arrange scuppers so throat openings remain at or below the roofline weir and are protected from wind-driven spray with properly shaped throat lips and weir details.
For more on copper gutter components and downspout options that integrate with scuppers, see our copper gutters and downspouts resource for contractors.
Designing Effective Overflow Paths and Emergency Drainage
Overflow paths are the building’s safeguard when primary drainage becomes restricted by debris, ice, or extreme events. On coastal Massachusetts projects, wind-driven rain and tidal air can accelerate clogging and increase water volumes, so redundancy is critical. Design overflow paths that lead water away from windows, cornices, or masonry faces to prevent staining and freeze damage.
Use continuous overflow scuppers, concealed overflow channels, or deliberate low points in the roof plane as engineered emergency relief. Ensure overflow routes are at least the same capacity as the primary scuppers to avoid creating a new bottleneck. When roof geometry or historic façades prevent large overflow openings, provide multiple smaller overflow points distributed along the length.
Detail overflow terminations to avoid creating discharge points that spray onto pedestrian areas or architectural details. On historic restorations consider hidden diverters or scupper extensions that discharge into ground-level drains or splash blocks. Always coordinate overflow elevations with the building’s exterior drainage and foundation protection strategy to ensure long-term durability.
Leader Head Selection, Function, and Sizing Guidance
Leader heads (leader boxes) are junctions between gutters or scuppers and vertical downspouts. They perform flow control, allow visual inspection, and reduce water velocity into the downspout. For Cape Cod projects, leader heads also provide a repairable point where winter ice or debris can be cleared without disturbing roof flashings.
Sizing a leader head begins with the calculated inflow from the contributing gutter or scuppers. A practical guideline is to provide a leader head throat opening equal to or greater than the combined inlet area. Where designers want spillway behavior, size the top of the leader head to act as a temporary storage and weir so water spills over rather than backflows under wind-driven conditions.
Material and fabrication considerations matter: choose copper thickness appropriate to the job—common trade choices include 16 oz, 20 oz, or heavier for exposed historic work. Custom leader heads can include debris screens, removable tops for cleaning, and scupper adapters. Cape Cod Copper fabricates custom leader heads and leader boxes to measured drawings or field dimensions; see our leader boxes and finials category for examples and specification options.
Downspout Layout, Sizing, and Wind-Driven Rain Considerations
A robust downspout layout balances capacity, routing, and exposure to coastal winds. Downspout sizing should follow calculated roof flow but also account for wind-driven rain that can push water laterally into openings and increase the effective flow into a given leader head or scupper. Vertical runs should avoid abrupt changes in direction and be anchored with corrosion-resistant straps at regular intervals.
Rule-of-thumb sizing used by many contractors: on projects expecting heavy coastal storms, allow approximately one 3" round downspout for every 300–400 sq ft of roof area under high-intensity design assumptions, and use 4" downspouts where a single outlet must serve larger basins. These are conservative trade guidelines; always verify by calculation using the inflow formula and adjust for roof slope, multiple inlets, and local rainfall intensity.
Routing decisions affect performance: keep downspouts as straight and short as possible, terminate above grade or into underground drains sized to accept the peak flow, and use offsets or elbows that minimize debris accumulation. On coastal properties, specify heavier gauges or thicker copper where mechanical damage or salt air require increased durability. Also consider removable cleanouts or access points at grade for inspection and maintenance.
Fabrication & Detailing: Copper Options, Joints, and Roof Connections
Copper offers longevity and a traditional appearance desirable on Cape Cod architecture, but successful integration depends on precision detailing. Select copper weight to match exposure and desired patina development: heavier weights (20 oz, 24 oz) are preferable for exposed leader heads and large gutters that will see heavy flows and mechanical loading.
Joint detailing—seamed vs. soldered—should be selected based on exposure and accessibility. Continuous seaming with mechanical locking is often used on gutters to allow thermal movement; soldered seams or watertight folded seams are appropriate at scuppers and leader head connections. Where scuppers penetrate parapets, coordinate backflashing and counterflashing with the roofing contractor to prevent water intrusion into the wall assembly.
Cape Cod Copper’s fabrication capabilities include CNC cutting, precision forming, roll forming of half-round and ogee gutters, and custom leader head and scupper forming from measured drawings. Specify connection details in contract documents and provide field-measured templates where complex cornices or historic reproductions are required. For integrated systems, include sleeves, flanges, and backing plates as needed to maintain water-tight transitions.
Installation Coordination: Roofers, Flashing, and Trade Responsibilities
Coordination between the roofing contractor, metalworker, and general contractor ensures that scuppers, overflow paths, and downspouts function as designed. Assign responsibilities for setting the elevation of scuppers, cutting wall openings for scupper throats, and installing concealed flashings so that the crew installing the copper components is not working against previously completed trades.
Document who provides and installs leader head stakes, downspout hangers, and attached flashing. For historic restoration work, annotate details for replicated profiles and indicate soldering or mechanical methods that preserve original appearance. Emphasize that Cape Cod Copper operates as a trade-only fabrication partner and can deliver custom components to match field measurements or shop drawings provided by roofing contractors and architects.
Finally, use a pre-installation mock-up when complex intersections are involved. A short mock-up shows how scuppers align to leader heads, how overflow paths behave at full flow, and how downspout terminations interact with grade and site drainage. Mock-ups reduce rework and ensure the final installed system meets both aesthetic and functional expectations.
Frequently Asked Questions
Q: What calculations should I use to size scuppers and downspouts for a Cape Cod roof?
A: Start with the roof catchment area and a conservative design rainfall intensity appropriate for coastal storms. Use the inflow formula (gallons = rainfall in/hr × area in sq ft × 0.623) to find gallons per hour, then convert to gallons per minute for sizing. From that flow, select scupper throat and downspout sizes using manufacturer capacity charts or accepted trade rules of thumb, and always verify against local code requirements.
Q: How do leader heads help during wind-driven rain events?
A: Leader heads act as intermediate reservoirs and visual inspection points. Properly sized leader heads reduce velocity into the downspout, allow excess to spill in a controlled way, and provide an accessible location to clear debris or ice. In wind-driven rain, leader heads sized with adequate throat and spillway capacity prevent backflow onto roof flashings and cornices.
Q: When should I specify heavier copper weights or custom fabrication for coastal projects?
A: Specify heavier weights (20 oz or 24 oz) and custom details when components are highly exposed, must match historic profiles, or will be subject to mechanical loading from ice and wind. Custom fabrication is recommended for unique scupper shapes, complex leader heads, or when mating to historic masonry where field templates are required. Cape Cod Copper provides made-to-measure fabrication for trade partners needing precision components.
Working from drawings, field measurements, or a custom detail? Cape Cod Copper partners with trade professionals to fabricate copper components made to fit the job, from custom flashings and roof panels to leader heads, chimney caps, vents, and decorative architectural details. Call (508) 946-1999 or email capecodcopper2@gmail.com to review your project requirements.