
Introduction
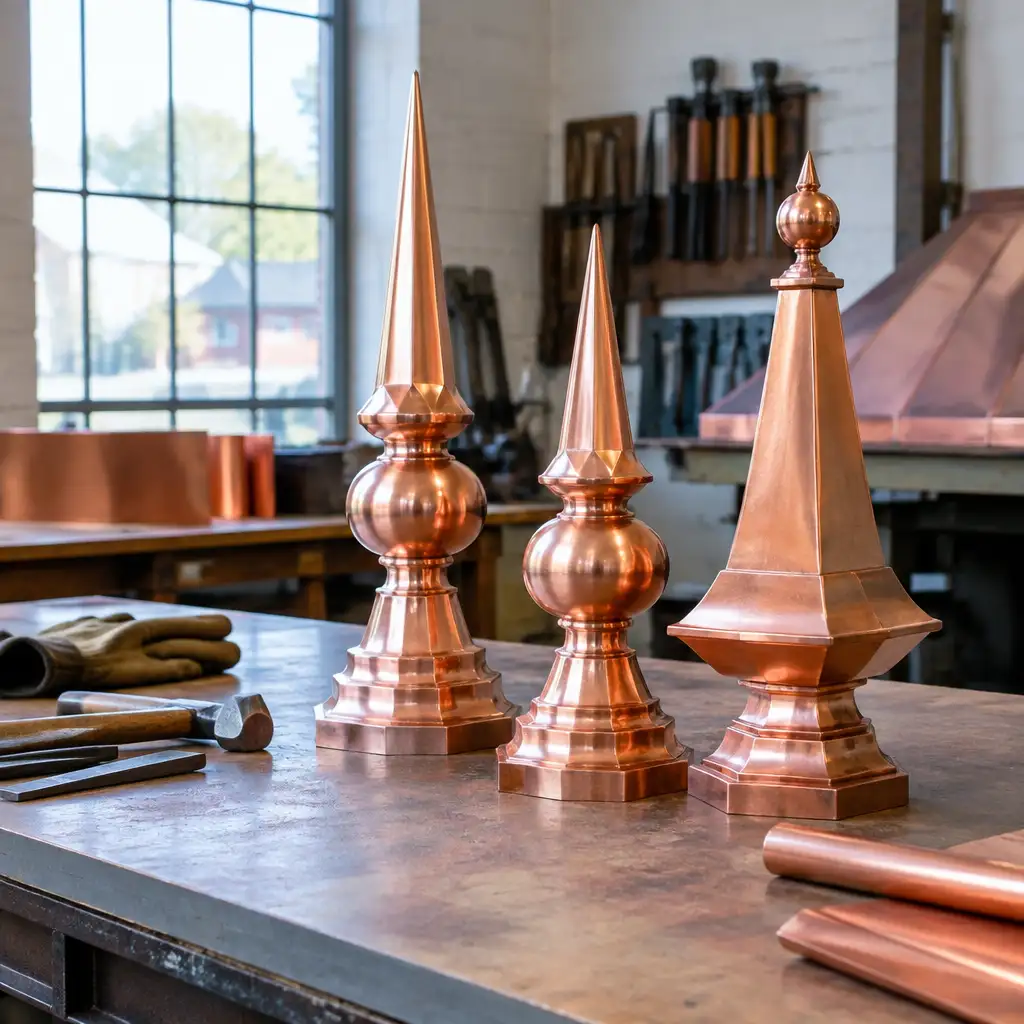
For architectural metal fabricators serving roofing contractors and restoration specialists in Massachusetts and across New England, large ornamental copper finials present a distinct set of challenges. Reproducing historic profiles, engineering reliable mountings for coastal wind loads, and reinforcing delicate ornamentation for long-term exposure requires fabrication experience, measured workflows, and attention to material selection. This article outlines fabricator-centered best practices for copper finials used on churches, municipal buildings, and custom homes along the coast.
Throughout this guide we use pragmatic, shop-tested recommendations targeted at professional trades: roofing contractors, architectural metal workers, restoration specialists, and suppliers. The focus is on one-off and small-run fabrication: measuring historic finials, patterning and forming copper, specifying gauges and reinforcement, and detailing mechanical mounting systems that survive New England wind and salt exposure.
The target keyword for this piece is copper finials, which we’ll use naturally while detailing measurement methods, custom fabrication workflows, and engineering tips. Cape Cod Copper provides trade-only fabrication and historic reproduction capability; the practices here reflect the approach used by family-owned fabricators producing reliable, made-to-spec architectural copper components.
Readers will walk away with actionable routines for documenting profiles, choosing materials and gauges appropriate to coastal Massachusetts, and designing attachment methods that balance historic accuracy with structural performance. Wherever appropriate, we reference adjacent product categories and shop workflows to help integrate finial work into comprehensive roofing projects.
- Introduction
- Surveying and Measuring Historic Finial Profiles
- Reproducing One-Off Finial Casts and Patterning in Copper
- Material Selection and Gauging for Coastal Conditions
- Engineering Secure Mounting Systems for High Wind Loads
- Reinforcing Techniques: Internal Supports and Mechanical Fastening
- Fabrication Workflow: From Field Measurements to Shop Production
- Frequently Asked Questions
Surveying and Measuring Historic Finial Profiles
Accurate reproduction begins with thorough field documentation. For historic finials, measure overall height, the profile at key elevations, base and neck diameters, and the connection detail at the mounting point. Use calipers, tape measures, and flexible contour gauges to capture compound curves. Photograph the finial from multiple elevations—front, two sides, and a plumb-line reference—to aid in patterning back at the shop.
Document substrate conditions and available attachment points. Is the finial mounted to a timber post, a lead-lined sleeve, a steel stub, or a masonry pad? Record fastener types and any remnants of past reinforcement. This information determines whether the reproduction will accept an internal support rod, threaded mounting stud, or a welded/bolted base plate.
When the original is missing or severely deteriorated, field templates and surviving fragments are crucial. Create measured drawings on site and, when allowed, remove representative fragments for shop tracing. For projects in coastal Massachusetts and Cape Cod where originals may have been lost to storms or corrosion, documenting surrounding roof geometry and cornice profiles helps ensure the finial integrates with the roofline and drainage systems.
For trade partners needing fabrication reference, Cape Cod Copper often receives field measurements and photographs to produce finials from measured drawings. When appropriate, include a reference to existing architectural copper elements in the scope; linking decorative finial work to broader roof details can reduce interface issues with other components such as leader boxes and roof flashings. See our leader boxes and finials page for related examples.
Reproducing One-Off Finial Casts and Patterning in Copper
Once measurements and reference photos are in the shop, choose a patterning method. For complex, sculpted finials, make full-scale paper or thin plywood templates from site tracings. For symmetrical profiles, generate radial patterns and use rotational forming techniques on a mandrel. Patterning should account for seams, hems, and soldering access while preserving the historic profile.
Large copper finials often require breaking the shape into manageable panels for forming and seaming. Decide between folded seams, standing seams, or butt seams with solder, depending on the visual needs and expected exposure. When soldered seams are historically accurate, leave access for capillary flow and cleaning to ensure long-term joint integrity.
For one-off reproductions, create a trial mock-up in economical gauge copper or sheet-metal substitute. The mock-up verifies proportions, seam alignment, and how the finial sits on its base. Make iterative adjustments to the pattern before committing to the final gauge; this saves time and reduces rework. The shop should record finalized patterns for future reference; tracing patterns digitally can streamline repeat orders or repairs.
Material Selection and Gauging for Coastal Conditions
Selecting the correct copper thickness is a balance between fidelity to historic appearance and structural durability. In coastal Massachusetts, heavier gauges resist denting and vibratory fatigue better than light materials. For large finials—especially those exposed to high winds—16 oz (0.021 in), 20 oz, or 24 oz copper are commonly used depending on scale. Thicker material improves longevity but increases forming difficulty and weight on the mounting system.
Consider lead-coated copper only when historically specified and when detailing permits. Lead-coated copper can offer additional corrosion resistance at interfaces but complicates soldering and requires careful handling. For most coastal applications, untreated architectural copper provides predictable patination and proven durability when properly detailed and mounted.
Also specify compatible fasteners and internal supports. Stainless steel rods and hardware resist galvanic corrosion when paired with copper if insulation measures are used at contact points. Use isolation washers or non-conductive sleeves where dissimilar metals meet to prevent accelerated corrosion from salt exposure. These material choices reduce long-term maintenance and extend service life in salt-laden coastal environments.
Engineering Secure Mounting Systems for High Wind Loads
Mounting is the single most important structural consideration for large copper finials on coastal rooflines. A robust attachment prevents uplift, reduces vibration, and limits metal fatigue. Design the mounting system to distribute loads into the roof structure rather than relying on thin roof sheathing or decorative bases alone.
Common approaches include a threaded stainless steel stud anchored into a timber blocking or a welded plate bolted to structural steel. When anchoring into masonry, use stainless anchors rated for lateral and uplift forces, and embed a stainless or galvanized base plate with through-bolts and backed by bearing plates within the roof void. Detail connections to allow for movement and to prevent water ingress at the sleeve or base plate.
For roof-mounted finials, coordinate mounting penetrations with roof flashings and transitions. Integrate the finial base flashing into the surrounding roof sheet-metal system to maintain weather tightness and to control runoff. For trade-level guidance on coordinating finial bases with adjacent roof details, reference our roofing panels and flashings resources to align flashing profiles and attachment strategies.
Reinforcing Techniques: Internal Supports and Mechanical Fastening
Reinforcement options depend on finial size, shape and wind exposure. Internal support rods (stays) are typical for tall, slender finials: a central stainless rod running from the mounting stud up through the finial secures the assembly and resists bending. For wider, heavier finials, internal ribs or an integral steel frame can transfer loads to the base while keeping the copper skin non-structural.
When welding or brazing stainless internal members, leave adequate clearance between copper and steel or use insulated sleeves to avoid galvanic interaction. Mechanical fastening—such as rivets or stainless screws—can secure support plates to the copper shell without penetrating critical weathertight seams if placed in concealed areas. Wherever possible, locate fasteners in areas protected by flashings or hemmed edges to prevent direct exposure to salt spray.
Vibration dampening is often overlooked. Use neoprene or other vibration-isolating materials at contact points between the copper and internal support to reduce metal-on-metal wear that leads to fatigue cracks. Periodic inspection access, or designing removable access panels, makes future maintenance and reinforcement easier for roofing contractors and preservation teams operating in coastal climates.
Fabrication Workflow: From Field Measurements to Shop Production
A reliable workflow reduces errors and shortens lead times. Begin with a documented submittal package: measured drawings, photographs with scale references, a material and gauge schedule, and a mounting detail that reflects the site’s structural conditions. Confirm these details with the contractor and, if applicable, the preservation architect before releasing patterns to production.
In the shop, produce a paper or digital template set and perform a mock assembly in light gauge to check fit and alignment. Proceed to final forming, seam preparation, and finishing. For repeatability or future repairs, catalog the finalized pattern set and record the exact hardware and reinforcement used. This is especially useful on historic restoration projects where matching a finial years later may be required.
Coordinate delivery and installation requirements with the roofing contractor. For field installation, provide clear instructions for anchorage, the torque values for fasteners, suggested sealants or mastics at penetrations, and recommended inspection intervals. If the finial is part of a larger copper scope—such as leader boxes, flashings, or gutters—coordinate interfaces to avoid interference and to maintain weatherproofing seams across components. For ordering and project coordination, contractors may contact Cape Cod Copper to request a quote or discuss fabrication specifics.
Frequently Asked Questions
Q: What copper gauge is recommended for large rooftop finials in coastal New England?
A: For large finials in coastal settings we typically recommend 16 oz to 24 oz copper depending on scale, wind exposure, and the desired visual profile. Heavier gauges resist denting and fatigue, but the selection should account for forming capability and the loads imposed on the mounting system.
Q: How should a finial be anchored to prevent wind uplift on a shingled or metal roof?
A: Anchor designs should transfer loads into structural blocking or steel members beneath the roof deck. Use threaded stainless studs with backing plates or bolted base plates into timber blocking or structural steel. Coordinate the penetration with roof flashings and use isolation materials to prevent galvanic corrosion where dissimilar metals meet.
Q: Can copper finials be reproduced from photographs alone?
A: Photographs can be a starting point but accurate reproduction is best when combined with measured drawings or templates. When originals are missing, use architectural context—cornice heights, roof pitches, and nearby trim profiles—to scale a reproduction. Whenever possible, secure field verification or partial samples to improve accuracy.
Working from drawings, field measurements, or a custom detail? Cape Cod Copper partners with trade professionals to fabricate copper components made to fit the job, from custom flashings and roof panels to leader heads, chimney caps, vents, and decorative architectural details. Call (508) 946-1999 or email capecodcopper2@gmail.com to review your project requirements.