
Introduction
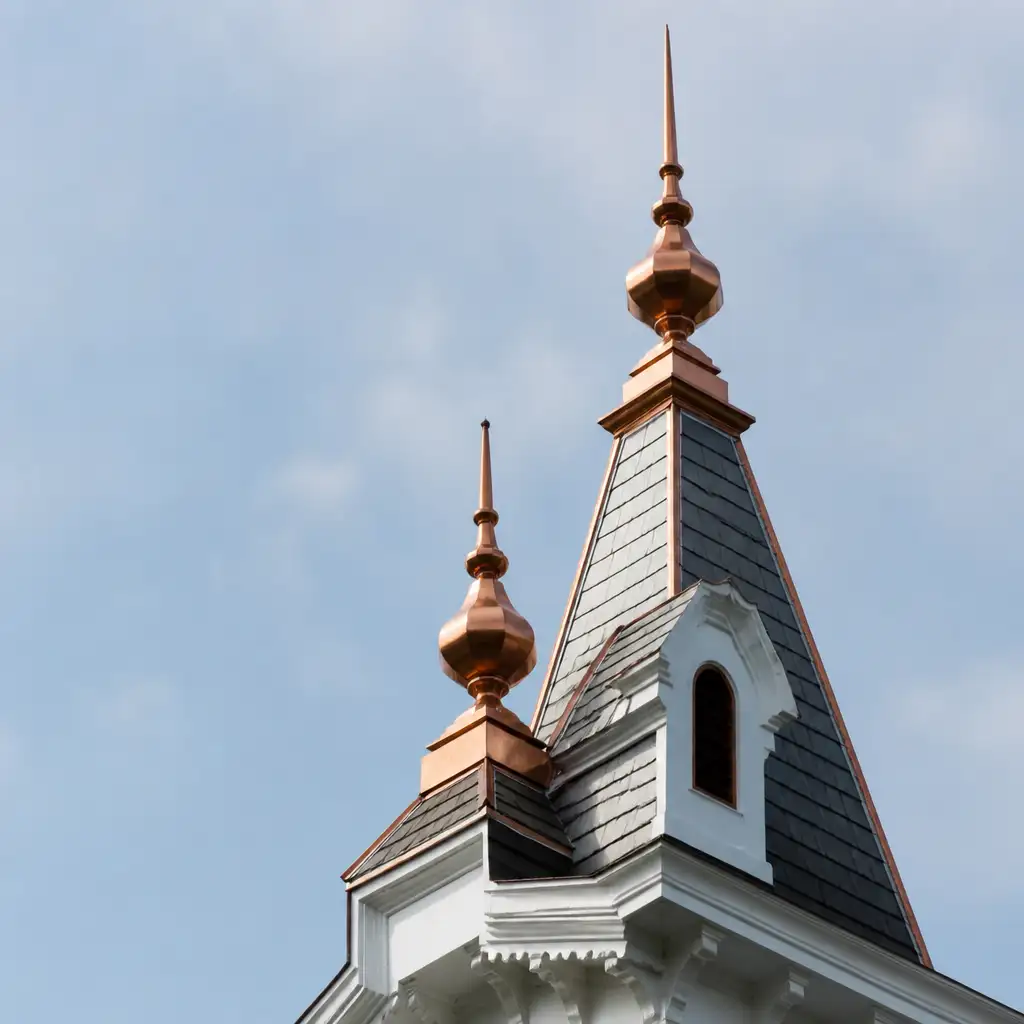
Reproducing historic copper finials for restoration projects requires a blend of careful measurement, material knowledge, precision forming, and close collaboration between preservation contractors and fabricators. This article outlines a step-by-step fabrication and matching approach tailored to contractors working on historic and coastal properties across Massachusetts and New England. The focus is practical: how to turn measured drawings and field dimensions into one-off copper finials that match original profiles and patinas while meeting modern attachment and longevity requirements.
Intended for roofing contractors, restoration specialists, architects, and metal subcontractors, the guidance here emphasizes trade workflows, fabrication checkpoints, and installation details. We cover how to document existing conditions, select appropriate copper gauges, and use CNC forming, radius work, and traditional hand-finishing to reproduce complex shapes. The target keyword copper finials is used throughout to ensure clear relevance for contractors searching for restoration fabrication partners.
Projects in coastal Massachusetts and Southeastern Massachusetts introduce additional considerations—salt air exposure, freeze-thaw cycles, and historic preservation standards—that affect material choices and finish matching. Cape Cod Copper’s experience producing measured-drawing fabrications and one-off components informs the recommended workflows, and the article highlights how to integrate finial reproduction into broader roof restoration scopes, including leader boxes and compatible rainwater systems.
By following a methodical process—survey, measured drawings, material selection, CNC and radius forming, patina matching, and engineered mounting—contractors can minimize surprises, preserve historic character, and ensure durable results. Practical checklists and collaboration tips are included to streamline communication between jobsite teams and the fabricator.
- Introduction
- Measured drawings and surveying existing finials
- Material and gauge selection for historic reproductions
- CNC forming, radius work, and one-off fabrication workflows
- Patina and finish matching for historic copper finials
- Mounting, attachment, and flashing details
- Collaboration workflow for preservation contractors and fabricators in Southeastern Massachusetts
- Frequently Asked Questions
Measured drawings and surveying existing finials
The first step in reproducing copper finials is a thorough on-site survey and measured drawing. For surviving originals, document overall height, base dimensions, profile sections, and any internal mounting cores or threaded rods. Photographs from multiple angles, detailed elevation sketches, and scale references (such as a tape measure visible in photos) reduce ambiguity when the fabricator prepares shop drawings.
When originals are missing or severely deteriorated, use archival photos, historic drawings, or comparable examples on the same building type to reconstruct profiles. Capture roofline geometry, relation to adjacent elements like ridge caps or leader boxes, and any cornice or molding that affects how the finial sits. Include clear notes on the intended location—ridge, turret, cupola, or steeple—because mounting loads and wind exposure differ significantly.
Measured drawings should include sectional callouts for radiused surfaces, seam locations, and internal support details. Provide target tolerances for visible seams and alignment, and specify whether the work is a faithful reproduction or a visually compatible replacement designed for code-compliant attachment. Early clarity in drawings minimizes iterations and helps the fabricator quote accurately.
Linking fabrication notes to related roofwork ensures coordinated details. When finials interface with roof flashings or leader boxes, reference the appropriate product details so adjoining copper work matches the new finial. For example, coordinating with leader boxes and finials manufacturing helps ensure consistent copper gauge and soldering practices across adjacent components. Contractors may also reference broader copper roofing requirements to align flashing and attachment strategies.
Material and gauge selection for historic reproductions
Material selection is fundamental: most authentic historic finials are fabricated from heavier architectural copper such as 16 oz (0.0219″), 20 oz, or 24 oz, depending on scale and exposure. Heavier gauges resist denting and maintain crisp profiles on larger roof ornaments, while lighter gauges can be acceptable for small decorative elements. Specify the gauge on shop drawings and confirm with the fabricator based on project priorities—appearance, durability, or weight constraints.
Consider lead-coated copper only when the project requires a lead-protected surface for soldering compatibility or specific historic assembly methods; otherwise, plain architectural copper is standard for visible ornamentation. Also document whether the finial will receive mechanical fasteners, a steel core, or a timber core for attachment—this affects the copper thickness and seam design to accommodate fastening without risk of fatigue.
Preservation projects in coastal Massachusetts must factor in long-term patina development and galvanic considerations when adjacent materials are present. If the finial will be installed near painted metal or stainless steel anchors, specify isolating materials or sacrificial layers to prevent galvanic corrosion. Confirm fabrication shop capabilities for working with chosen gauges, especially when radius work and CNC forming are required.
CNC forming, radius work, and one-off fabrication workflows
Reproducing complex finial profiles typically requires a hybrid workflow combining CNC-assisted forming and skilled hand-finishing. CNC press brakes and roll formers can produce consistent curved panels, fluted sections, and repetitively radiused elements. For one-off, irregular shapes, CNC templates and incremental forming reduce setup time while preserving the custom nature of the piece.
Radius work—corners, domes, and tapered cones—demands attention to developing patterns from the measured drawings. Fabricators use digital flattening of 3D profiles to create accurate sheet patterns, then verify fit with physical templates or mockups. For single-piece domes or layered stacked finials, seams must be planned to be visually minimal and structurally sound for soldering or seam welding.
One-off fabrication workflows often include an initial shop drawing and a small-scale mockup or cardboard template approved by the preservation contractor before full-scale fabrication. This signoff step is essential for projects constrained by historic review boards or architectural approval in New England. The fabricator should document forming sequences, seam types (e.g., standing seams, folded seams), and recommended soldering practices to meet longevity goals.
When coordinating larger restoration work, integrate finial fabrications with other architectural copper components. For example, when finials interface with copper roof panels or flashings, aligning material gauges and soldering schedules ensures consistent weathering and structural integration with the broader roof system. Reference the roofing panels and flashings specification to confirm compatible transitions.
Patina and finish matching for historic copper finials
Matching the patina of an existing finial—or forecasting how a new finial will age in a coastal Massachusetts environment—is a core restoration concern. Discuss whether the objective is to reproduce the current aged appearance or to match the original bright-finish condition. Natural patination timelines vary with coastal exposure, roof slope, and nearby pollutants, so the fabricator should review site conditions when proposing finish options.
Options include leaving new copper unpatinated to allow natural weathering, applying a chemical patina to accelerate color development, or using a tailored sealer to stabilize an achieved finish. When accelerating patina, test panels and mockups are recommended to confirm color, texture, and longevity under local conditions. Documentation of the chosen patina process should be included in the fabrication package for future maintenance reference.
Consistent patina across multiple components—finials, leader heads, and gutters—improves visual integration on historic buildings. Coordinate finish choices with adjacent components such as leader boxes and downspouts so the overall ensemble weathers uniformly. If the project includes new gutters or downspouts, consider specifying compatible copper gauges and finishes to avoid jarring contrasts after natural patination occurs.
Mounting, attachment, and flashing details
Finials impose attachment and flashing requirements that differ by roof type and location. A ridge-mounted finial may transfer wind loads into the ridge assembly, while a turret finial may require a concealed internal anchor bolted to structural framing. Specify anchor types, load ratings, and required penetrations in shop drawings and coordinate with the roofing contractor to detail roof penetration flashing and counter-flashing sequences.
Design mounting interfaces to allow for differential movement between the finial and the roof substrate. Where possible, use isolated stainless steel or bronze anchors with non-conductive washers to prevent galvanic reactions. Provide clear instructions for the roofing crew on backer plates, through-fastening, and final soldering or sealant applications to ensure watertight integration with adjacent flashings.
When a finial sits next to or above leader boxes, coordinate the finial base and leader head elevations so water shedding follows intended paths. If the finial requires a curb or mounting boss on a copper roof, ensure the curb detail is consistent with standard copper roofing practices and compatible with preexisting drain paths. For projects that include new rainwater systems, reference the copper gutters and downspouts specification to confirm attachment heights and clearances.
Collaboration workflow for preservation contractors and fabricators in Southeastern Massachusetts
Successful finial reproductions depend on early and ongoing collaboration. Start with an initial scoping meeting on site—ideally attended by the preservation contractor, roofing foreman, and the fabricator’s estimator or project manager. Review measured drawings, mockups, and any historic reference materials, and establish approval points for shop drawings, mockups, and finish samples.
Set clear communication protocols for revisions and change orders. Historic projects often uncover unforeseen conditions during scaffold or roof removal; a responsive fabricator with rapid one-off fabrication capability reduces downtime. Cape Cod Copper’s trade-only model emphasizes working directly with contractors and suppliers to maintain professional control over specifications and delivery expectations.
Plan logistics and lead times around seasonal constraints in New England. Fabrication windows, shipping to job sites, and on-roof installation schedules are affected by coastal weather and historic review timelines. Provide the fabricator with a realistic installation date so CNC forming, hand finishing, and patina testing can be sequenced without rush. For procurement and project contacts, contractors should contact the fabricator early to request detailed quotes and confirm shop capacities.
When administering approvals or submitting documentation to local preservation boards, include annotated shop drawings, material certificates, and patina test reports. These artifacts support approval and simplify on-site decisions. For project coordination or to begin a reproduction discussion, contact our fabrication team through the official channels to request drawings review and timeline estimates.
Frequently Asked Questions
Q: What information should I provide to get an accurate quote for a copper finial reproduction?
A: Provide measured drawings or scaled photos, overall dimensions, desired copper gauge, mounting method, and finish preference. Indicate the installation location on the roof and any adjacent copper elements like leader boxes or flashings. The more detail on site conditions and attachment, the more precise the quote and shop drawings will be.
Q: Can CNC forming reproduce tapered cones and fluted finial profiles accurately?
A: Yes. CNC-assisted forming and digital pattern development can accurately produce tapered cones, fluted profiles, and complex radii. However, one-off pieces often require hand-finishing and seam adjustment to achieve historic accuracy, so include a mockup or approval stage in the workflow.
Q: How do you match a new finial’s patina to existing copper on a historic building in coastal Massachusetts?
A: Matching patina typically uses test panels and controlled chemical treatments or accelerated weathering on sample sections. Coordinate finish samples with on-site conditions and agree on a standard before full production. Consider long-term natural weathering as part of the timeline and coordinate finishes with adjoining components like gutters and leader boxes for uniform appearance.
Working from drawings, field measurements, or a custom detail? Cape Cod Copper partners with trade professionals to fabricate copper components made to fit the job, from custom flashings and roof panels to leader heads, chimney caps, vents, and decorative architectural details. Call (508) 946-1999 or email capecodcopper2@gmail.com to review your project requirements.