
Introduction
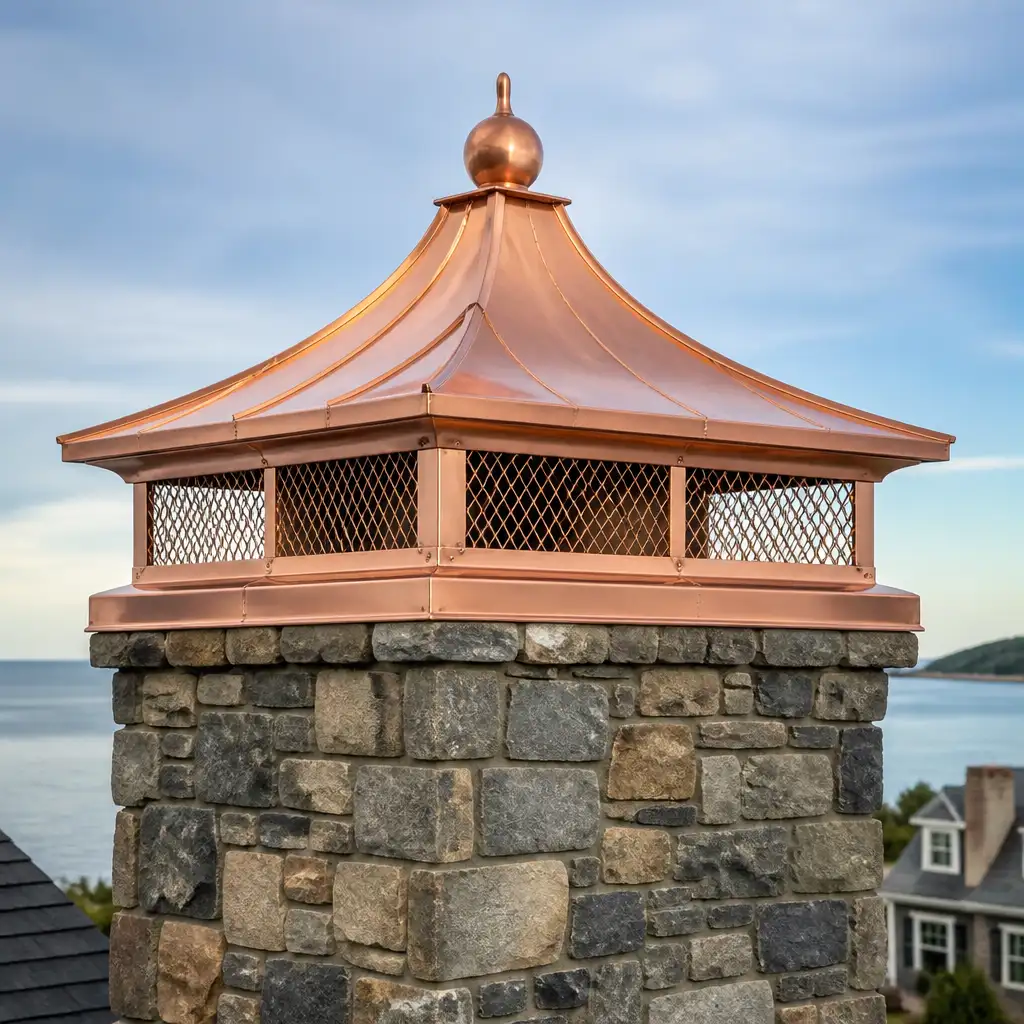
For contractors restoring historic masonry on the Southcoast of Massachusetts, a properly fitting copper chimney cap is more than an aesthetic detail — it protects masonry, prevents water intrusion, and preserves interior finishes. This article focuses on copper chimney caps and provides a practical, step-by-step contractor workflow from field measurement through shop tolerances to masonry mounting details that guarantee fit and long-term performance on restoration projects.
Content is written for roofing contractors, restoration specialists, masons, and architectural metal teams who supply or install custom copper work. It assumes familiarity with roofing terminology, basic masonry practices, and trade coordination. The guidance reflects New England coastal conditions and typical historic building details encountered in Southeastern Massachusetts.
We cover what to measure on site, how to use templates and measured drawings, recommended fabrication tolerances for copper chimney caps, integration with chimney flashing and roofing systems, and best practices for masonry anchorage and mortar interfaces. The goal is to reduce site rework, avoid on-site modification of delicate historic masonry, and streamline the hand-off between field and shop.
Where appropriate the article references product categories and contractor resources to support specification and ordering. Cape Cod Copper provides trade-only custom fabrication for contractors seeking precision copper components on historic restorations and large-scale projects throughout Massachusetts and New England.
- Introduction
- Field measurement and documentation
- Template and measured drawings
- Fabrication tolerances and material specifications
- Integration with chimney flashing and roof systems
- Masonry mounting methods and anchors
- Site delivery, install sequence, and field verification
- Frequently Asked Questions
Field measurement and documentation
Accurate site measurement is the foundation of a good workshop-to-site fit. Start with a site visit led by the contractor or restoration specialist with authority to approve dimensions. Record overall chimney footprint, throat size, flue count and spacing, offsets, brick coursing, crown slope, and any existing coping or corbelling that will affect the cap interface.
Use calibrated measuring tools: steel tapes for linear dimensions, digital inclinometers for chimney crown slope, and a straightedge or laser line to check planarity. Note any out-of-plumb conditions and record heights from fixed roof lines or adjacent roof planes. Photograph all faces of the chimney with scale references and capture tight shots of mortar joints, crack routes, and previous repairs.
Document penetration clearances and any obstructions such as parapet returns, corbels, or decorative brickwork. Record roofing material transitions and the position of adjacent flashing details. These measurements and photos form the basis for templates and the measured drawings submitted to the shop and reduce uncertainty when fabricating custom caps for historic chimneys in Coastal Massachusetts.
Template and measured drawings
Templates are indispensable for complex chimneys. For simple rectangular or square chimneys, a site-scribed template using heavy craft paper or thin plywood gives the shop a physical pattern to work from. Ensure templates extend past the masonry face where the cap will overlap. Label each template with orientation, flue IDs, and the date taken.
Measured drawings should accompany or replace physical templates depending on project logistics. Drawings must include plan and elevation views, throat opening dimensions, vertical offsets, crown slope, and recommended overhangs. Mark the intended counterflashing and step flash locations — this information ties directly to the copper chimney cap detail and the roof flashing plan.
Cape Cod Copper fabricates from measured drawings and templates, so clarity is critical. When preparing submission materials, highlight which surfaces are original historic masonry and which are new repairs. If a temporary mortar or replacement brick is planned, note that so shop tolerances can be adjusted to anticipated final conditions.
Fabrication tolerances and material specifications
Specify material gauge and finish up front. For architectural chimney caps on restorations, copper in 16 oz (0.021″), 20 oz (0.028″), or 24 oz (0.033″) is commonly used depending on scale and structural demands. Thicker gauges resist denting and provide more substantial edge profiles over time — important on coastal projects exposed to wind-driven debris.
Define shop tolerances for critical dimensions. Typical tolerances for custom copper caps are ±1/8″ on linear dimensions up to 48″ and proportional allowances beyond that, but tolerances should be tightened when caps interface with narrow mortar joints or precision corbelling. Detail hem widths, edge returns, and lap allowances explicitly in the drawing notes so the shop and field share expectations.
Include instructions for soldering, seams, and weathertight joints. Decide whether seams will be soldered, folded-lock seamed, or standing seam style; this affects clearance requirements at corners and throat interfaces. For historic work, provide specifications for matching patina or leave natural copper for natural ageing as per the restoration brief.
Integration with chimney flashing and roof systems
Successful chimney cap fit requires coordination with chimney flashing and the immediate roof system. Specify how the cap ties into the chimney counterflashing and the apron or step flashing scheme. Where a cap includes an integrated flare or apron, indicate the intended lap over the roof flashing to maintain a continuous water shed.
On pitched roofs with standing seam panels or traditional shingles, interface details must respect panel profiles and fastener locations. For projects requiring additional roofing work, reference the roofing panels and flashings page so roofers and metalworkers coordinate panel transitions and step-in flashings with the cap geometry.
At the measurement stage, verify the relationship between the top roof plane and chimney crown. Note any necessary offsets for ventilation components or spark arrestors. Where vents or roof-mounted equipment sit close to the chimney, record those locations to avoid clashes at installation.
Masonry mounting methods and anchors
Mounting a copper chimney cap to historic masonry requires techniques that protect the fabric of the chimney while providing adequate anchorage. Common masonry mounting methods include through-bolt anchors with lead or stainless-steel anchor plates set into mortar joints, brass or copper strap anchors, and corrosion-resistant threaded inserts set with epoxy in sound brick or stone.
Prefer reversible and non-invasive anchorage when working on historic fabric. Avoid drilling through sound bricks where possible; use mortar-joint anchors set into lime-compatible repair mortar when preservation guidelines require minimal intervention. Where through-bolt methods are necessary, place anchors in mortar joints and use copper or stainless-steel anchor plates sized to spread load and prevent point stresses.
Detail the interface between cap skirt and masonry: recommended skirt depth, soft-lead or EPDM compression joints, and options for breathable but watertight seals. If the cap overhangs a projecting corbel or returns into a narrow coping, specify folded hem dimensions and clearance tolerances so the shop can form the skirt to sit flush without hammering or forcing against masonry.
Site delivery, install sequence, and field verification
Plan delivery and installation sequence to minimise handling and reduce time on the roof. Pre-fit checks at a staging area can catch fabrication issues before lifting. For larger caps, deliver in protective wrapping with clear orientation marks and the measured drawing attached to the crate for installer reference.
On arrival, perform a field verification using the original templates and drawings. Check that skirt heights align with masonry courses and that flue apertures are correctly located. Verify throat clearance and ensure any required accessories — lead collars, compression seals, or fastener kits — are present. If minor adjustments are necessary, use soft tools and a controlled approach; do not modify historic masonry in the field without restoration oversight.
Coordinate with the roofing contractor to sequence final flashing and counterflashing installation. The cap should be installed after roof underlayment and primary flashings are in place but before final counterflashing to allow access for sealing and anchor setting. Communicate any required mortar repairs or tuckpointing prior to cap installation to ensure the cap seats on sound masonry.
Frequently Asked Questions
Q: What measurements are essential to fabricate a cap that won’t require on-site modification?
A: Essential measurements include the throat opening(s), plan footprint, elevation offsets, chimney out-of-plumb values, crown slope, and distance to adjacent roof planes. Provide templates or measured drawings showing these dimensions plus photographs of masonry courses and nearby flashing details.
Q: Which copper gauge is appropriate for chimney caps on historic buildings in coastal New England?
A: Gauge selection depends on scale and exposure. 16 oz copper is common for smaller caps, while 20 oz or 24 oz is recommended for larger or more exposed caps where stiffness and impact resistance matter. Specify gauge in the procurement documents so the shop fabricates to expected performance.
Q: How should a cap be anchored to avoid damaging historic brick or stone?
A: Use mortar-joint anchors, stainless or copper anchor plates, or reversible anchorage methods. Avoid through-bolting into sound bricks when preservation standards discourage it. Consult masons and preservation specialists to select anchorage compatible with historic mortar and repair plans.
Working from drawings, field measurements, or a custom detail? Cape Cod Copper partners with trade professionals to fabricate copper components made to fit the job, from custom flashings and roof panels to leader heads, chimney caps, vents, and decorative architectural details. Call (508) 946-1999 or email capecodcopper2@gmail.com to review your project requirements.